If you’re a plant manager, production supervisor, or maintenance lead at a manufacturing facility that uses automatic paint lines, you know that even a single faulty spray gun can derail an entire shift, create costly rework, and push your line’s efficiency right off target. As a supplier of automatic paint lines with 18 years of on-the-ground experience, I’ve seen firsthand how rushed, reactive maintenance on spray guns turns small issues into major headaches: clogged nozzles causing uneven coating, worn fluid tips leading to overspray, and seal failures that result in messy, time-consuming cleanup. This blog isn’t just a list of tasks—it’s the routine, process-driven care we’ve helped hundreds of our clients implement to keep spray guns running reliably, paint quality consistent, and your line hitting its output goals every week. Automatic Paint Line

First, let’s ground this in why spray gun maintenance isn’t a “set-it-and-forget-it” step. Automatic spray guns in production lines operate in far harsher conditions than the handheld models DIYers use: they’re exposed to harsh solvents, constant spray pressure, fine paint particles that work their way into tiny crevices, and repeated heating/cooling cycles if your line includes cure ovens. We’ve had a client in agricultural equipment manufacturing who cut spray gun lifespan from 6 months to just 2 months because they skipped a weekly nozzle flush; another in consumer electronics lost $12,000 in rework in one quarter alone because a clogged air cap caused uneven paint on plastic phone casings. These aren’t isolated cases—consistent, scheduled maintenance eliminates 90% of the issues we’re called to fix at our service calls.
Let’s start with the core, non-negotiable maintenance: daily checks, which take 15 minutes at the start of every shift and are non-negotiable, not optional. This isn’t a complicated task; it’s a quick walkaround and visual inspection that anyone on the production team can do, as long as we train them properly. First, power off the paint line’s air and fluid supply before starting—safety first, always. Then, check the air cap, the small metal disc at the front of the gun that controls spray pattern. Look for paint buildup around the air holes, even tiny specks; even a single blocked hole can cause an uneven pattern or sputtering spray. We also teach our clients to use a soft nylon brush (never metal, which can scratch the air cap and leave ridges that catch paint) to gently wipe the exterior of the air cap, being careful not to bend the air holes. Next, inspect the fluid nozzle, which sits just behind the air cap. Look for cracks, gouges, or discoloration—any damage here will cause paint to leak or spray irregularly. If you see damage, mark the gun for replacement immediately; don’t wait until it ruins a batch of parts. Also, check the seal between the fluid nozzle and the gun body; if you see paint seeping out here, a seal is wearing out, and addressing it now is far cheaper than a full gun replacement.
After the daily pre-shift check, the next critical step is a weekly deep clean. This is where spray guns trap the most residue, especially if you use solvent-based paints that dry quickly once exposed to air. For this, you’ll need a dedicated cleaning station (we design these as part of our automatic paint line packages, with ultrasonic cleaning options for high-volume facilities) and the correct solvents—match the solvent to your paint type: lacquer thinner for lacquers, urethane-specific solvent for urethane paints, and water for water-based paints (never use harsh solvents on water-based guns, as they damage seals). First, disassemble the gun: separate the air cap, fluid nozzle, needle, and fluid nozzle seat, and set each part in a container of the appropriate solvent to soak for 10–15 minutes—don’t let parts dry out, as dried paint is almost impossible to remove. While parts soak, use a small, stiff-bristled nylon brush to scrub the exterior of the gun body, paying extra attention to the fluid inlet and air connections, where paint and solvent can mix and leave sticky residue. After soaking, use a soft-bristled pipe cleaner (or a lint-free cotton swab for tiny holes) to clear any remaining paint from the air cap holes and the fluid passages in the gun body—never use wire, as it can widen holes and ruin the spray pattern. Once all parts are clean, dry them completely with lint-free cloths, then reassemble the gun hand-tight; over-tightening can warp seals or damage the nozzle. Finally, test the gun on a spare piece of scrap material at 50% of your regular operating pressure to check for even spray pattern before putting it back into line use.
Monthly maintenance is the step most clients skip, but it’s what extends spray gun lifespan by 30% on average, per our internal data. This isn’t just about cleaning—it’s about inspecting and replacing worn components before they fail. First, test the air and fluid pressure regulators on each gun; use a pressure gauge to verify that they’re calibrated to your line’s specifications (usually 25–50 PSI for spray guns, depending on your paint type). If they’re off, recalibrate them immediately—even a 5 PSI difference can cause inconsistent paint thickness. Next, check the needle spring and the trigger seal; these parts wear out from repeated use, and a worn spring can cause the needle to stick, leading to uneven paint application. We keep a standard spare parts kit for every spray gun on our automatic paint lines, which includes needles, springs, seals, and nozzles, so you can swap these out in less than 10 minutes during monthly checks. Another key monthly step is lubrication—we use food-grade, solvent-compatible lubricant for the trigger and needle mechanisms (never use regular grease, which can mix with paint and cause defects). Apply a small amount to the trigger pivot and the needle shaft to keep movement smooth, preventing sticking that can lead to spray interruptions. Also, inspect the entire mounting assembly—automatic spray guns are mounted on robots or reciprocators, and loose mounts can cause the gun to shift during operation, leading to misapplied paint or collisions with parts. Tighten any loose bolts and check for signs of wear on the mounting brackets, replacing them if needed.
Quarterly maintenance is for high-utilization lines (running 24/5 or more), and it’s the time to do a full teardown and inspection of internal components you don’t access during regular cleaning. First, completely disassemble the gun, separating the handle, fluid section, and air section. Inspect the inside of the fluid passages for any hard, dried paint buildup—if you find it, soak the entire gun body in solvent for 30 minutes before scrubbing with a nylon brush to avoid damaging the internal ports. Check the gun’s air motor (if your gun uses an air motor for actuation) for wear on the vanes; worn vanes reduce gun speed, leading to inconsistent spray. If the vanes are scored or less than half their original thickness, replace the motor before it fails. Also, test the gun’s spray pattern at full operating pressure; if it’s uneven or has a narrow pattern, it’s a sign that the air cap or nozzle is worn, and it’s time for a replacement. We recommend replacing air caps every 6 months for high-volume lines, and nozzles every 12 months, as these are precision parts that lose tolerance over time, even if they look clean.
Now, let’s talk about common mistakes we see clients make that cut spray gun lifespan by half, which you can avoid. First, using the wrong solvent for cleaning—using lacquer thinner on a urethane gun will break down the seals, leading to leaks within a month. Second, skipping the post-clean dry step; leaving parts damp can cause rust on metal components, which creates gouges that damage paint. Third, not keeping spare parts on hand—waiting for a replacement nozzle to ship means your line is down for days, not hours. Fourth, not documenting maintenance; if you don’t track when you replaced a seal or calibrated a gun, you’ll end up guessing when it needs service, leading to missed checks and avoidable issues.
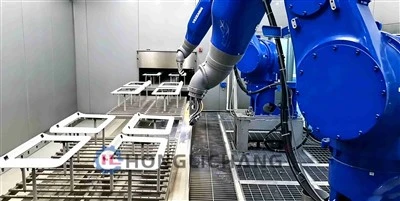
At the end of the day, the goal of spray gun maintenance on automatic paint lines isn’t just to fix problems—it’s to prevent them. A small, 15-minute daily check, a 30-minute weekly clean, and a 1-hour monthly inspection will add years to your spray guns, reduce rework, and keep your paint line running at peak efficiency. If you’re looking to upgrade your automatic paint line or refine your spray gun maintenance process, we’ve helped thousands of manufacturing facilities optimize their lines, reduce downtime, and improve paint quality for their products. To learn more about how our line solutions can support your maintenance goals, connect with our team today.
Robot Paint Plant References
- National Association for Surface Finishing (NASF). "Best Practices for Spray Gun Maintenance in Automated Finishing Lines." 2022.
- Automotive Manufacturing Solutions. "Reducing Downtime in Paint Operations Through Preventive Maintenance." 2021.
- DuPont Performance Coatings. "Guidelines for Cleaning and Maintaining Industrial Spray Equipment." 2020.
- Robotic Industries Association (RIA). "Preventive Maintenance Protocols for Robotic Paint Systems." 2023.
Shenzhen Honglichang Machinery Manufacturing Co., Ltd.
We are one of the most professional automatic paint line manufacturers and suppliers in China, also support customized service. Please feel free to buy advanced automatic paint line for sale here from our factory. Welcome to contact us for quotation.
Address: No.A802, Building 2, Tianan Digital Plaza, Longgang, Shenzhen, China
E-mail: victor@honglichang.com
WebSite: https://www.honglichang-paint.com/
